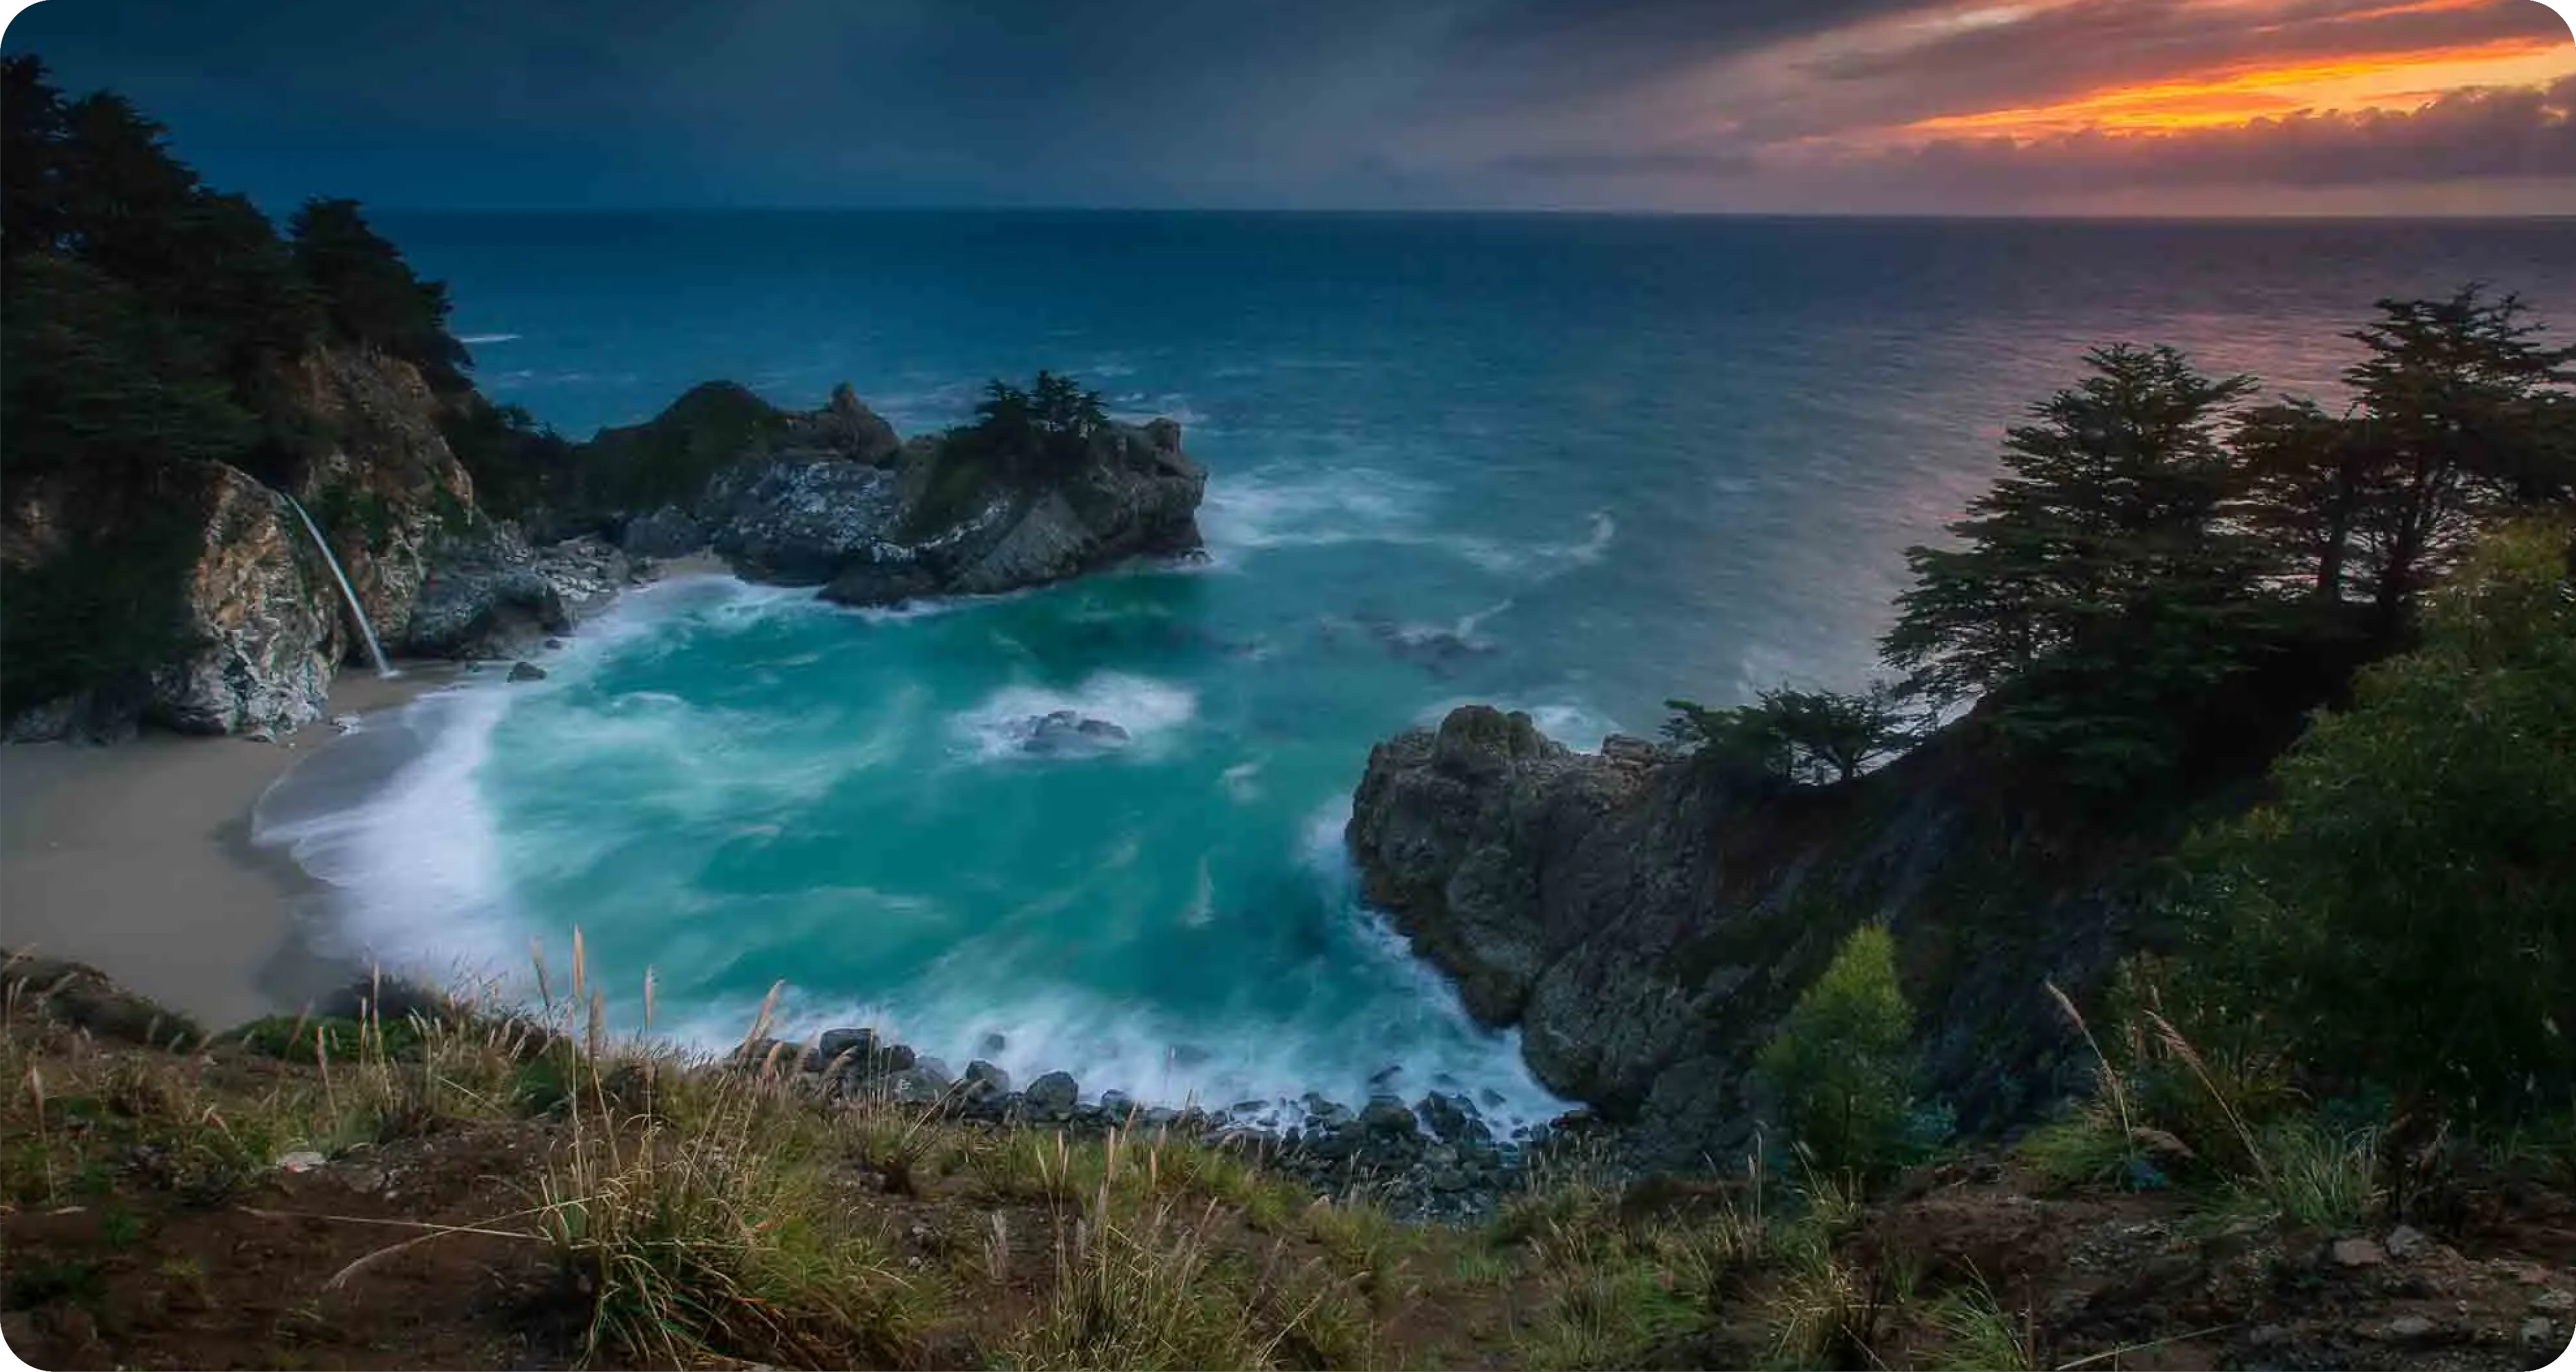
Skip to content

LANDSCAPE

Elevate your Landscape Photography.

We've compiled this list of tips & tricks as well as gear recommendations to help you create some of the world's greatest images.

Whether you’re just getting started or you’ve been shooting landscapes for years, we hope you’ll learn something new.

Light Shift

Time of day changes everything for a landscape. Consider what sunrise, mid day, and sunset look like at the same location. Use an Neutral Density or Polarizer filterto help control light in unfavorable conditions.

Image:A sunrise almost slept through. These vibrant pinks only lasted for a few minutes.

Camera Settings: 26mm F22 1.3” 50ISO

Blurring Waterfalls

Use a tripod and neutral density filter to shoot long exposures mid day. Expose for several seconds to blur water movement while the sun is still up.

Image:The powerful water of Igauzu Falls blurred with the help of an ND.

Camera Settings: 17mm F11 0.5” 800ISOGear used: Tiffen NATural ND and Davis & Sanford Traverse TR684C-36

Unusual Perspectives

Shoot from an angle your wouldn’t normally see with your eyes. Use a drone or get low to the ground for a fresh perspective. Polarizer filters are a great way to reduce highlights on snow.

Image: An aerial view of a glacier creates abstract shapes and patterns.

Camera Settings: 24mm, F11 1/400” 500ISOGear used: Tiffen Drone Filters

Close Focus

Don’t forget about the details! Wide angle lenses are great for showing vast landscapes, but don’t be afraid to get close to your subject. A UV protector filter is a great choice to keep nature outside of your lens during up close shots.

Image: A small detail from a lush alpine meadow can be as good as a photo of the mountains.

Camera Settings: 35mm F14 1/200” 800ISO

Scale Matters

Add a subject for scale. Show how large a landscape really is by including a subject in frame. Use our Steadicam AIR monopod to help support your camera & lens while keeping an agile setup.

Image: A bird soars past the large waterfall system of Igauzu Falls.

Camera Settings: 302mm F22 1/2000” 3200ISO

HDR Photography

Shoot bracketed exposures to maximize details in highlights and shadows. Make sure to keep the camera still between shots. Make sure to use a tripod to keep your bracketed exposures aligned.

Image: Bracketed Photos later merged as HDR in Lightroom bring out the rich colors in the sky and detail in the foreground.

Camera Settings: 16mm F22 0.6 +2.5 + 5” 100ISO

Polarizer Power

Use a polarizer filter to cut reflections or darken the sky.See more beauty in a landscape with a polarizer.

Image: A polarizer helped bring out detail in the vegetation and darkened the skies.

Camera Settings:35mm F8 1/320” 50ISOGear used:Tiffen Circular Polarizer

Blue Hour

Don’t pack up after the sun sets. Blue Hour is a great time to shoot landscapes with balanced light. Make sure to use a tripod during blue hour; the low level of light requires long exposures.

Image: A soft natural light is created as day fades into night; perfect for shooting moody landscapes.

Camera Settings: 16mm F8 15” 1000ISO

Location Scouting

Know your location before you get there. Go on Google Earth to get an idea of what the landscape looks like. Study the terrain and layout on Google Earth to help previsualize compositions. Neutral Density / Polarizer filters are a great way to bring out color in landscapes.

Image:While searching on Google Earth, I noticed these colorful rock formations.

Camera Settings: 24mm, F6.3 1/60” 1600ISO Gear used: Tiffen Drone Filters

Nature Harmony

Look for complimentary colors in nature to make your images pop. Green trees and blue water make a great combination for photos. Consider using a diffusion filter like Pro-Mist or Fog to add atmosphere to your scene.

Image: Oregon’s famously blue McKenzie River pairs well with the green trees surrounding it.

Camera Settings: 16mm, F14 1.6” 640ISO